Reishi mushrooms (Ganoderma lucidum), known as the “mushroom of immortality,” are celebrated for their glossy, reddish-brown appearance and potential health benefits, often linked to immune support and stress reduction. Cultivating Reishi at home offers a way to enjoy this revered mushroom, which is challenging to find fresh in stores. In this guide, we’ll cover two main cultivation methods: the bag method—ideal for those wanting a more controlled, indoor environment—and the log method, a natural approach that can produce Reishi over several years. Unlike faster-growing mushrooms, Reishi has longer growth periods, making it a rewarding project for patient growers interested in a unique experience.
In this Guide:
- What is Reishi Mushroom?
- Choosing Your Growing Method: Log vs. Bag
- How to Grow Reishi in Bags
- How to Grow Reishi on Logs
- Harvesting & Storage Tips
What is Reishi Mushroom, and Is It Easy to Grow?
Reishi mushrooms are prized for their distinctive varnished surface and have been used in traditional medicine for centuries. Native to hardwood trees, including oak and maple, Reishi mushrooms thrive in natural settings but can also adapt to controlled indoor environments. Known for bioactive compounds such as polysaccharides and triterpenes, they are popular in wellness practices worldwide.
Is Reishi Easy to Grow?
Growing Reishi mushrooms requires specific conditions for optimal results. They have longer growth periods than faster-fruiting mushrooms like Lion’s Mane, needing sustained humidity and temperature levels. The bag method is suitable for those seeking a quicker indoor option, though the process still takes several months as reishi takes a little longer to colonize, while the log method allows for more traditional, outdoor cultivation that can yield seasonal harvests over multiple years. There are also Reishi mushroom grow kits you could buy online to skip pass the colonization stage (continue below for more).
Reishi Mushroom Growth Stages:
- Spawning Stage: 2-3 weeks
- Colonization Stage: 6-12 weeks (longer for logs)
- Pinning Stage: 2-3 weeks
- Fruiting Stage: 2-4 weeks
- Harvest Stage: Reishi is ready when caps and stalks are fully developed, with a glossy finish.
Choosing Your Growing Method: Log vs. Bag
It’s essential to select a growing method that aligns with your environment and expectations for the growth period.
Growing in Bags:
- Best for: Indoor growers who want quicker control over humidity and light.
- Pros: Allows for a stable environment with a faster initial yield.
- Pros: If you buy a grow kit bag it takes half the time to grow it reguraly
- Cons: Requires careful substrate preparation, humidity, and light adjustments.
- Ideal for: Indoor cultivators aiming for quicker results in a few months.
Growing on Logs:
- Best for: Outdoor growers who prefer a natural, long-term project.
- Pros: Low-maintenance setup; yields mushrooms seasonally over multiple years.
- Cons: Requires significant patience, as initial growth can take up to 12 months.
- Ideal for: Those with outdoor space who enjoy a traditional, low-effort setup.
Both methods can yield high-quality Reishi mushrooms if managed correctly. Read on for detailed instructions on each technique and tips for a successful Reishi harvest.
Growing Reishi Mushrooms in a Bag: A Step-by-Step Guide
The bag method is a popular choice for cultivating Reishi mushrooms indoors. By using a controlled environment, you can streamline the growing process and enjoy a more consistent yield. This method involves creating a suitable substrate (the medium in which the mushrooms grow), inoculating it with Reishi spawn, and maintaining stable conditions to support mycelium growth and fruiting. Here’s a comprehensive guide to each step of growing Reishi mushrooms in a bag.
1. Preparing Your Supplies and Growing Space
To start, gather the necessary materials and set up a clean, dedicated space for your Reishi mushroom cultivation. Or you can also check out:
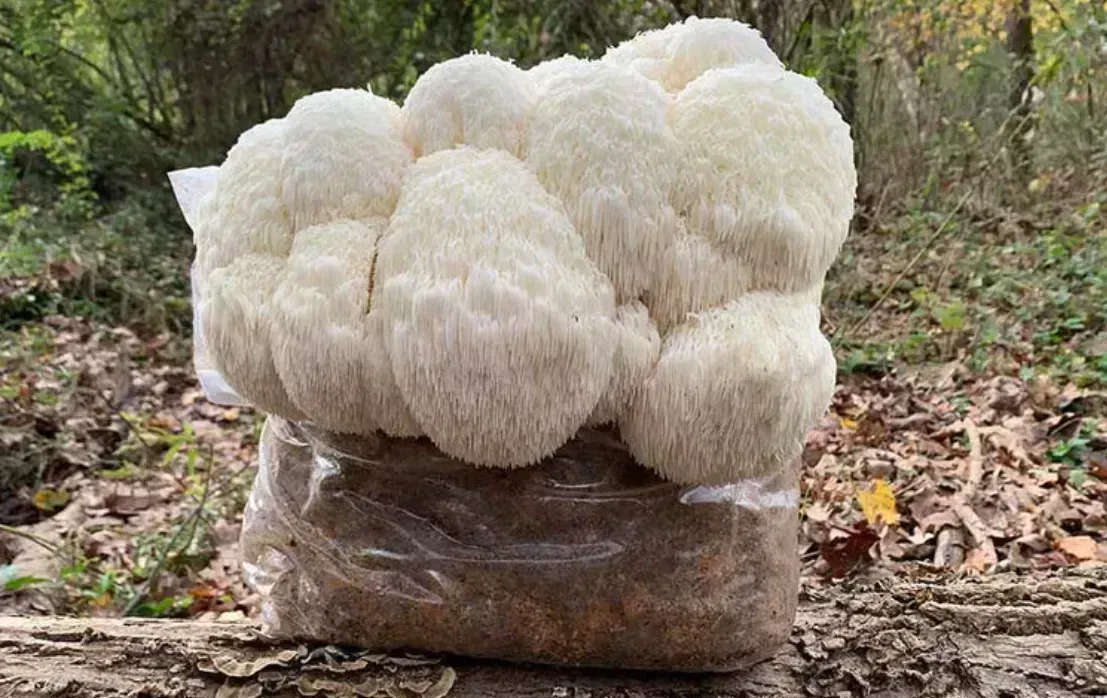
- Reishi Grow Kit: You can buy a Reishi Grow Kit from a trusted online supplier like North Spore or MycoLabs. The grow block comes already colonized and ready to fruit, eliminating a couple weeks of time if you were to grow it from the first step.
If you bought a grow kit, you can skip to step 5. If you want to start growing your own reishi mushrooms from scratch continue below for what you'll need.
Recommended Supplies:
- Reishi Grain Spawn: The “seed” that will grow into your mushrooms. It’s essential to purchase high-quality Reishi spawn from a trusted supplier, like North Spore, to reduce contamination risks.
- Substrate Options:
- Hardwood Sawdust: Reishi mushrooms prefer hardwood sawdust as a substrate base, as it mimics the nutrient profile of their natural habitat.
- Wheat Bran or Rice Bran: Adding 10-20% bran to the sawdust substrate enriches it with nutrients, promoting faster and healthier mycelium growth.
- Mushroom Grow Bags: Use bags with filter patches, which allow air exchange while keeping out contaminants.
- Pressure Cooker: Essential for sterilizing the substrate to remove any competing organisms.
Setting Up Your Growing Space:
- Clean Environment: Choose a dust-free area with stable temperatures between 70-75°F (21-24°C) to support mycelium growth.
- Humidity Control: Reishi mushrooms thrive in high humidity (85-95%) during the fruiting stage. Consider using a humidifier or misting the space regularly.
Tip: For beginners, pre-made grow blocks are a fantastic option. These blocks are fully colonized and ready to fruit, allowing you to skip substrate preparation and go directly to fruiting.
2. Preparing the Substrate
If you’re preparing your own substrate, using a hardwood sawdust mix is ideal for Reishi. The substrate serves as the food source for the mushrooms, so it’s crucial to prepare it correctly.
Using Hardwood Sawdust as a Substrate:
- Mix the Substrate: Combine hardwood sawdust with 10-20% wheat or rice bran. This added nutrition helps the mycelium colonize the substrate more efficiently.
- Adjust the Moisture Content: Aim for 60-65% moisture in the substrate. You can test this by squeezing a handful of the mixture—if it clumps together without dripping, it’s ready.
- Pack and Sterilize: Fill your mushroom grow bags with the prepared substrate, leaving some space at the top. Sterilize the bags in a pressure cooker at 15 PSI for 90-120 minutes to eliminate potential contaminants.
Pro Tip: Hardwood sawdust pellets (available at many garden and mushroom supply stores) are a convenient substrate option. Just soak them in water to break them down before adding the bran supplement.
3. Inoculating the Substrate
Inoculation is the step where you introduce the Reishi spawn to your prepared substrate, allowing the mycelium to spread and “colonize” the substrate.
Steps for Inoculation:
- Clean Your Workspace: Wipe down all surfaces with alcohol or a mild bleach solution. Wash your hands thoroughly and wear gloves to reduce contamination risks.
- Add the Reishi Spawn: Once the substrate bags have cooled to room temperature, open them and add Reishi grain spawn (about 2-3 cups per 5 pounds of substrate). Use a sanitized tool or gloved hands to mix the spawn evenly.
- Seal the Bags: After mixing, fold the top of each bag and secure it with a zip tie, making sure the filter patch remains exposed for airflow.
Tip: Mixing the spawn thoroughly throughout the substrate promotes even colonization, which leads to a healthier and more productive mycelium.
4. Incubating the Mycelium
During incubation, the Reishi mycelium will gradually spread throughout the substrate. This phase can take anywhere from 3 to 6 months and requires stable conditions.
- Store in a Dark, Warm Area: Place the inoculated bags in a dark, warm environment with temperatures between 70-75°F (21-24°C).
- Monitor Mycelium Growth: Reishi mycelium is white and begins spreading within 2-4 weeks. Over the next few months, you should see it gradually colonizing the substrate.
- Check for Contaminants: Keep an eye out for any green, black, or yellow patches, which can indicate contamination. Remove any affected bags immediately to prevent the spread.
Fun Fact: Reishi mycelium breaks down the hardwood substrate, digesting it to create nutrients that will support the growth of mushroom fruiting bodies.
5. Transitioning to Fruiting Conditions
Once the substrate is fully colonized (usually in 3-6 months), you can transition the bags to fruiting conditions to encourage mushroom formation. If you bought a Reishi grow kit, your bag is already fully colonized and ready to fruit so start here:
- Setting Up a Fruiting Chamber: Use a clear plastic container with holes for ventilation. Line the bottom with damp perlite or place a container of water inside to maintain humidity.
- Cutting Slits in the Bag: With a clean knife, cut 2-3 small slits or “X” shapes on the surface of each bag to allow mushrooms to emerge.
- Placing the Bags in the Fruiting Chamber: Position the bags with the slits facing outward in the humid environment. Reishi mushrooms require indirect light and steady airflow to grow well.
Humidity and Light Requirements:
- Humidity: Keep humidity levels between 85-95% by misting the inside of the chamber daily or using a small humidifier.
- Light: Reishi mushrooms need indirect light for about 12 hours per day during fruiting. A simple LED light or a nearby window works well.
Tip: The distinctive “antler” shape of Reishi mushrooms (tall, horn-like structures) occurs in low-CO₂ environments, while a high-CO₂ environment can result in the classic, flat “conk” shape. Adjusting your airflow can help you achieve the shape you prefer.
6. When and How to Harvest
Reishi mushrooms have a unique appearance and texture that makes harvesting them slightly different from other mushrooms.
- When to Harvest: Reishi mushrooms are ready to harvest when their caps have fully developed and have a lacquered, shiny finish. This typically takes 2-3 weeks after they begin to emerge.
- How to Harvest: Use a sharp, clean knife to cut the mushrooms at their base, close to the bag. Avoid pulling or twisting, as this can disturb the mycelium and affect future flushes.
- Preparing for Additional Flushes: After harvesting, keep the substrate in humid conditions, as it can often produce more mushrooms in subsequent flushes.
Pro Tip: For Reishi mushrooms, harvesting when the cap is fully formed and shiny helps preserve their medicinal compounds, which are most potent at this stage.
Troubleshooting Common Issues
Growing Reishi mushrooms in bags can come with challenges, but here are solutions to common problems:
- Contamination: If you notice discolored patches, especially green or black, it indicates mold or bacterial contamination. Remove affected bags immediately, and make sure you’re following proper sterilization practices.
- Slow Growth: If the mycelium is spreading slowly, it could be due to low temperature or moisture. Ensure stable warmth during incubation and consistent humidity during fruiting.
- Mushrooms Failing to Fruiting: If your Reishi doesn’t start forming fruiting bodies, check that your humidity levels are high enough and ensure it’s receiving indirect light.
Growing Reishi mushrooms in bags offers an exciting and controlled way to cultivate this ancient mushroom indoors. With patience, the right conditions, and a little care, you’ll enjoy watching your Reishi grow from mycelium to stunning, lacquered mushrooms. In the next section, we’ll explore how to grow Reishi mushrooms on logs for a more natural, outdoor cultivation method that yields mushrooms for several years.
Growing Reishi Mushrooms on Logs: A Step-by-Step Guide
Growing Reishi mushrooms on logs is a rewarding way to cultivate this medicinal mushroom in an outdoor setting. While it takes longer than indoor bag cultivation, the log method can produce mushrooms over multiple years, making it an excellent choice for those who want a sustainable, low-maintenance setup. Reishi grows naturally on hardwood logs, which provide the nutrients and stability for steady mycelium growth and consistent yields. Here’s how to set up your Reishi log grow from start to finish.
1. Preparing Your Supplies and Choosing the Right Logs
The first step to cultivating Reishi on logs is gathering the necessary supplies and selecting suitable logs for inoculation.
Supplies You’ll Need:
- Reishi Plug Spawn: Plug spawn consists of small wooden dowels inoculated with Reishi mycelium. Plug spawn kits (such as those from North Spore) often include the spawn, drill bits, and wax, making them a convenient choice!!!
- Logs: Reishi mushrooms grow best on freshly cut hardwood logs like oak, maple, or beech. Fresh logs provide the moisture and nutrients needed for colonization and mushroom production.
- Inoculation Tools:
- Drill: A drill with a 5/16-inch bit is ideal for creating holes to insert the plug spawn.
- Hammer or Mallet: Used to gently tap the plug spawn into the drilled holes.
- Wax: Wax (such as beeswax or cheese wax) is melted and applied to each inoculation point to seal in moisture and prevent contamination.
Choosing Your Logs:
- Best Time to Cut: Logs should be cut from live trees in late winter or early spring when they are dormant. This timing ensures the logs are free of competing fungi and contain the high moisture levels essential for mycelium growth.
- Ideal Log Size: Choose logs around 3-4 feet long and 4-8 inches in diameter. This size provides plenty of surface area for inoculation while remaining manageable to handle.
- Wood Species: Reishi thrives on hardwoods like oak, beech, and maple, which decompose slowly, providing nutrients over several years.
Pro Tip: Freshly cut logs (within 2-6 weeks of cutting) are ideal, as they contain the natural moisture and nutrients Reishi mycelium needs for strong colonization.
2. Inoculating the Logs
Inoculation is the process of introducing the Reishi mycelium to the logs. This is a crucial step for ensuring that the mycelium takes hold in the wood, setting the foundation for mushroom growth.
Steps for Inoculating Reishi Logs:
- Drill the Holes: Using a 5/16-inch drill bit, drill holes approximately 1-1.5 inches deep. Space the holes 4-6 inches apart in a diamond pattern along the log. A 3-foot log will typically need about 30-40 holes to provide enough mycelium coverage.
- Insert the Plug Spawn: Place a plug spawn into each hole and gently tap it in with a hammer or rubber mallet until it’s flush with the surface of the log. Make sure each plug is snugly fit for good contact with the wood.
- Seal with Wax: Melt your wax and apply it over each inoculation point with a brush or applicator. This step prevents the spawn from drying out and protects it from contamination. For added moisture retention, consider waxing the cut ends of the logs.
Common Mistake: Skipping the wax seal can lead to drying out, which slows mycelium growth. Ensure each inoculation point is fully covered with wax.
3. Setting Up Logs for Incubation
After inoculating your logs, they need time to incubate. During this period, the Reishi mycelium spreads throughout the wood, transforming it into a nutrient-rich environment for future mushroom growth. Incubation typically lasts between 9 and 18 months, depending on wood type and local climate.
Finding the Right Location:
- Shady, Humid Area: Place the logs in a shady, humid outdoor area. Ideal spots include under trees or next to buildings that provide consistent shade.
- Elevate the Logs: Keep the logs off the ground by placing them on bricks, pallets, or other supports. This prevents soil-borne fungi from contaminating them and also improves airflow around the logs.
Arranging Your Logs:
- Lean-To Stack: Lean the logs against one another or against a support structure to maximize air circulation.
- Log Cabin Stack: Alternatively, stack the logs in a crisscross pattern, which provides stability and ventilation.
Incubation Tip: During dry spells, water the logs with a garden hose to maintain moisture. Soaking them for a few hours if conditions are particularly dry will also help the mycelium continue spreading.
4. Monitoring and Incubating the Logs
Patience is key during the incubation phase, as Reishi mushrooms take time to colonize the logs. Depending on conditions, full colonization can take anywhere from 9 to 18 months.
Signs of Mycelium Growth:
- White Mycelium: Over time, you should see white mycelium forming near the plug sites or peeking out from under the bark. This is a sign that the Reishi mycelium is establishing itself.
- Peeling Back Bark: Gently peel back a small section of bark to check for white, fuzzy mycelium underneath. This indicates the log is being thoroughly colonized.
Fun Fact: As the mycelium digests the wood, it transforms the log into a nutrient-dense environment primed for fruiting. This slow breakdown of lignin and cellulose also makes Reishi logs valuable for enriching soil when they’re no longer productive.
5. How to Tell if Logs Are Fully Colonized
Knowing when your logs are ready to fruit is key to a successful harvest.
Signs of Full Colonization:
- White Mycelium Under the Bark: Carefully peel back a small area of bark to check for thick, white mycelium coverage.
- Solid, Dense Sound: Tapping the log lightly should produce a firm sound, indicating that the wood is well-colonized and ready to support mushroom growth.
- Timeline Expectation: Logs inoculated in spring may be ready to fruit by the following fall or the next spring, depending on weather conditions and wood type.
Patience Reminder: Allowing the mycelium to fully colonize without rushing to fruiting will result in healthier, more productive Reishi mushrooms.
6. Encouraging Fruiting and Harvesting Reishi Mushrooms
Once your logs are fully colonized, it’s time to encourage fruiting, which typically occurs in cool, damp weather (spring and fall are ideal). You can also stimulate fruiting by soaking the logs after the 9–18 month incubation period, once colonization is confirmed.
Soaking the Logs to Trigger Fruiting:
- Soak for 24 Hours: To simulate a heavy rain event and trigger fruiting, submerge the logs in water for 24 hours.
- Set Up in Fruiting Conditions: After soaking, place the logs in a shady, humid location, either lying horizontally or propped upright in the soil for stability.
Maintaining Fruiting Conditions:
- Humidity: Reishi mushrooms thrive in high humidity (85-95%) during fruiting. Regular misting or a garden sprinkler can help maintain moisture around the logs.
- Airflow and Light: Ensure there’s adequate airflow to prevent mold growth. Reishi mushrooms need indirect light to fruit properly, so placing them in a shaded outdoor area or under a tree canopy is ideal.
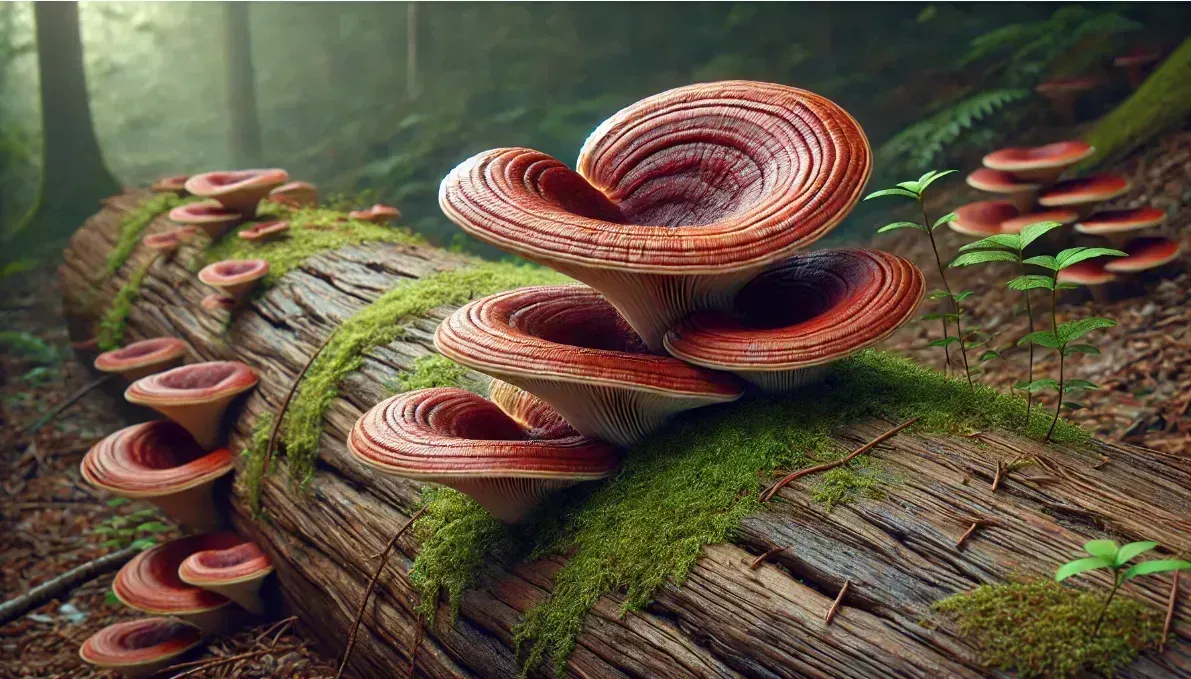
Pro Tip: Reishi mushrooms form “conk” structures with a glossy, varnished appearance. Proper humidity and indirect light will encourage this classic look.
7. When and How to Harvest Reishi Mushrooms
Harvesting Reishi mushrooms is a unique process, as they have a tough, woody texture that requires different handling than softer mushroom varieties.
When to Harvest:
- Fully Developed Conks: Reishi mushrooms are ready when their conks are fully formed and have a lacquered, shiny finish. This usually occurs about 2-3 weeks after they start appearing on the log.
- Observation Tip: Harvesting at this stage preserves their medicinal compounds, which are at their peak in fully matured Reishi mushrooms.
How to Harvest:
- Use a Sharp Knife: Cut the mushrooms at the base, close to the log. Avoid twisting or pulling, as this can damage the underlying mycelium and affect future yields.
- Prepare for Multiple Flushes: After the first harvest, keep the logs in a humid environment, as they can produce additional flushes over time.
Storage Tip: Reishi mushrooms are often dried for teas, tinctures, or powders. Simply slice them and dehydrate or air-dry in a well-ventilated space before storing in airtight containers.
Final Tips and Common Issues
Growing Reishi mushrooms on logs can be a long-term project, but here are some final tips to ensure success:
- Maintain Consistent Moisture: Reishi mushrooms need steady moisture. Check your logs regularly and water them during dry periods.
- Watch for Competing Fungi: If other fungi appear on the logs, remove them and increase airflow to discourage further contamination.
- Be Patient: Reishi is a slow-growing species, so don’t rush the process. Allow the mycelium time to colonize the log fully before expecting fruiting.
With patience, care, and the right conditions, you’ll be rewarded with beautiful, lacquered Reishi mushrooms that can be harvested over several years. This natural, outdoor cultivation method offers a unique connection to nature and provides a steady supply of this valuable medicinal mushroom. Enjoy the journey and happy growing!
Storing Your Reishi Mushrooms
Once you’ve harvested your Reishi mushrooms, proper storage will help preserve their quality and potency, allowing you to enjoy them long after the growing season.
- Dehydration: Due to their woody texture, Reishi mushrooms are often dried for long-term storage. Use a food dehydrator or set them out in a well-ventilated, low-humidity area until they are completely dry. Once dried, store them in an airtight container in a cool, dark place. Properly dried Reishi mushrooms can last up to a year.
- Freezing: For added longevity, you can freeze dried Reishi slices in a sealed, airtight container or zip-top bag. This method helps retain the mushrooms' potency and can extend their shelf life even further.
Fresh vs. Dried Reishi Mushrooms
Each storage method offers different ways to use your Reishi harvest:
- Fresh Reishi: Freshly harvested Reishi mushrooms have a leathery, dense texture. They can be simmered directly in water to make tea or processed into tinctures. Fresh Reishi is ideal if you plan to use it within a few days of harvest.
- Dried Reishi: Dried Reishi mushrooms are more commonly used in teas, tinctures, and powders. The drying process concentrates their flavor and medicinal properties. Simply simmer dried slices in hot water to make Reishi tea or add powdered Reishi to smoothies, soups, or coffee.
Pro Tip: Rehydrating dried Reishi is simple. Just soak them in warm water for about 20-30 minutes before using in teas or broths.
Dive Deeper into Mushroom Cultivation
Growing Reishi mushrooms, whether indoors in bags or outdoors on logs, is a journey that connects you to one of the most revered medicinal fungi in history. Once you’ve mastered the basics, there’s a whole world of mushroom-growing projects waiting to be explored. Here are some ideas for expanding your mushroom cultivation experience:
- Reishi Tincture Recipe: Learn the step-by-step process of making a Reishi tincture, perfect for capturing the mushroom’s medicinal compounds in a concentrated form.
- How to Brew Reishi Tea: Discover a simple recipe for making Reishi tea using dried Reishi slices—a popular way to enjoy its earthy flavor and wellness benefits.
- More How-to-Grow Guides: Check out our other mushroom-growing guides on varieties like Shiitake, Maitake, and Cordyceps for a diverse home mushroom farm.
- Free Mushroom Cultivation eBook: Download our free eBook for an in-depth look at mushroom cultivation techniques, covering everything from substrate preparation to harvesting for multiple mushroom species.
These resources will help you get the most from your Reishi harvest and continue your exploration of mushroom cultivation. Happy growing, and enjoy the rewards of your hard work!