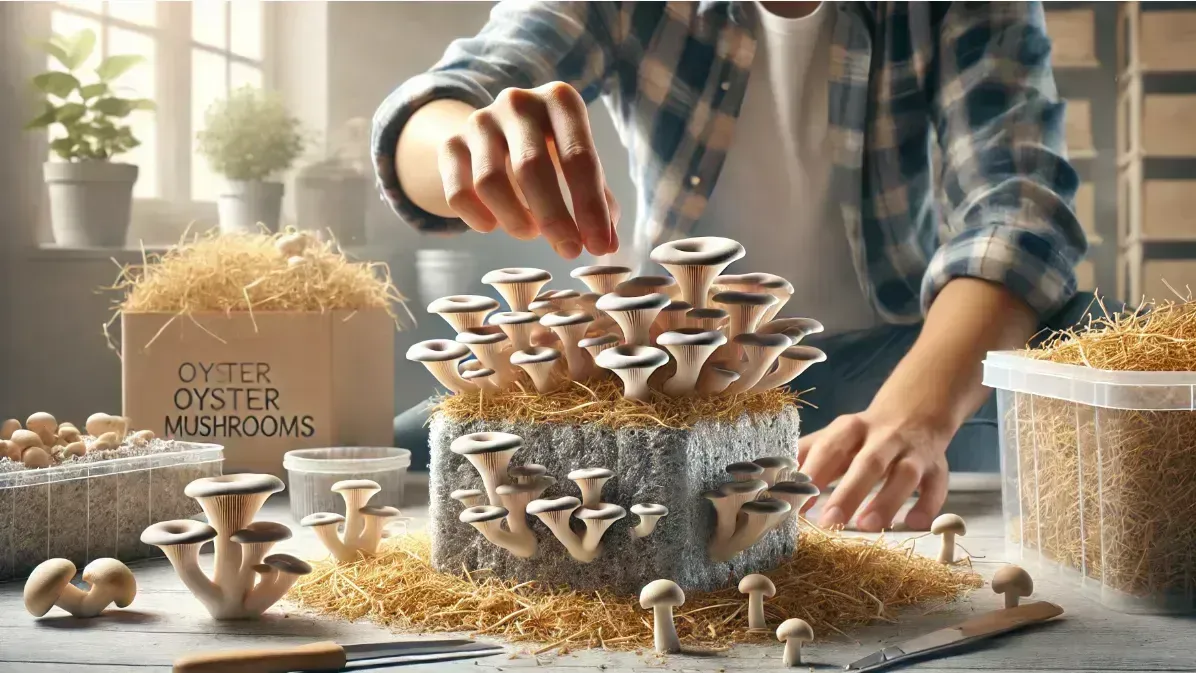
Oyster mushrooms (Pleurotus spp.) are some of the most versatile and easy-to-grow gourmet mushrooms, known for their mild flavor and rapid growth. Growing your own oyster mushrooms allows you to enjoy fresh, high-quality produce at home, even if it's difficult to find them in stores. In this guide, we’ll explore two effective cultivation methods: the bag method, ideal for those seeking a faster and easier yield and control over their growing environment. Then the log method, which is perfect for those who prefer a natural, outdoor setup that can produce mushrooms over several years. Whether you’re growing indoors or outdoors, you’ll find a method that suits your needs.
In This Review:
- What Are Oyster Mushrooms?
- Choosing a Growing Method: Log vs. Bag
- How to Grow Oyster Mushrooms in a Bag
- How to Grow Oyster Mushrooms on Logs
- How to Store & Use Your Harvest
- Dive Deeper into Mushroom Cultivation
What Are Oyster Mushrooms, and Are They Easy to Grow?
Oyster mushrooms are known for their fan-shaped caps and delicate, savory flavor. They naturally grow on decaying hardwoods like oak, beech, and poplar, helping to break down dead wood in forests. Their popularity among home growers comes from their ability to adapt to a variety of substrates, including straw, sawdust, and even recycled materials like coffee grounds.
Are They Easy to Grow?
Yes, oyster mushrooms are widely considered one of the easiest mushrooms to cultivate, making them a great choice for beginners. They grow quickly under the right conditions and adapt well to both indoor and outdoor environments. The bag method offers faster results and a more controlled indoor setup, while the log method allows for a traditional, outdoor approach that yields mushrooms over multiple years. With consistent moisture, proper airflow, and stable temperatures, both methods can lead to a successful harvest.
(Yes this guide can be used to learn how to grow King Oyster Mushrooms and Blue Oyster Mushrooms and other species of oyster mushrooms as well)
Oyster Mushroom Growth Stages:
- Spawning Stage: 1-2 weeks
- Colonization Stage: 2-3 weeks (Longer for logs)
- Pinning Stage: 1 week
- Fruiting Stage: 5-10 days
- Harvest Stage: Ready when caps are fully formed but edges are still slightly curled
Choosing Your Growing Method: Log vs. Bag
Before you start growing oyster mushrooms, it’s important to choose a method that aligns with your space, time, and desired outcome. Here’s a comparison of the two main methods:
- Growing in Bags:
- Best for: Indoor growers with limited space or seeking faster yields.
- Pros: Provides a controlled environment, quicker growth cycle, and year-round cultivation.
- Cons: Requires more initial setup, such as preparing substrates and maintaining high humidity levels. (Premade grow bags simplify this process.)
- Ideal for: Those who want to see results within a few weeks and can maintain a stable indoor environment.
- Growing on Logs:
- Best for: Outdoor enthusiasts with space and patience for a longer-term project.
- Pros: Mimics natural conditions and can yield mushrooms for 2-4 years from a single inoculation.
- Cons: Takes longer for the first flush (6-12 months) and requires space outdoors.
- Ideal for: Those who enjoy a more hands-off approach and want a sustainable setup for multiple harvests.
Choosing the right method depends on your growing environment and how quickly you want to see results. Read on to learn the step-by-step processes for both methods and discover which approach is best for you.
Growing Oyster Mushrooms in a Bag: A Step-by-Step Guide
Oyster mushrooms (Pleurotus spp.) are highly sought after for their delicious taste, rapid growth, and adaptability to a wide range of growing conditions. Unlike some other gourmet mushrooms, oyster mushrooms are some of the easiest mushrooms to cultivate at home, making them a great choice for both beginners and experienced growers. This guide will walk you through the entire process of growing oyster mushrooms using the bag method, from setting up your supplies to harvesting a bountiful flush.
1. Preparing Mushroom Supplies and Growing Space
Before diving into the growing process, it's essential to gather the right materials and prepare your growing space. A well-prepared setup can make the difference between a successful harvest and a disappointing one.
Pre-made Mushroom Grow Block: Buying a pre-made grow block online makes the process a lot easier as they come fully colonized and ready to fruit. Check out North Spore’s Oyster Mushroom Grow Kits if you are a beginner. If you want the full mushroom growing experience continue below:
- Substrate Options: (The base for grain spawn to colonize in)
- Straw: A popular, inexpensive substrate that oyster mushrooms thrive on. It’s ideal for home growers due to its ease of use.
- Hardwood Sawdust: Offers a more nutrient-dense option, allowing for larger yields. Suitable for growers seeking a more advanced setup.
- Mushroom Grow Bags: Specially designed bags with built-in filter patches that allow air exchange while keeping contaminants out. These are crucial for maintaining the right conditions during colonization and fruiting stages.
- Oyster Mushroom Grain Spawn: The “seed” that will grow into your oyster mushrooms. Grain spawn is typically made from grains like rye or millet that have been colonized by mycelium. Make sure to purchase from a trusted supplier to ensure quality.
- Setting Up Your Growing Space:
- Clean Environment: Choose a clean, dust-free area with stable temperatures between 65-75°F (18-24°C). A spare room, basement, or closet can work well. Clean the space thoroughly before starting to minimize contamination risks.
- Humidity Control: High humidity (85-95%) is crucial for mushroom growth. Consider using a humidifier to maintain moisture levels, or regularly mist the area around your grow bags with clean water.
Tip: If you’re new to mushroom growing, pre-made grow blocks can simplify the process, allowing you to focus on fruiting without needing to prepare your own substrate.
If you plan to use a pre-made grow block, skip to Step 6. Transitioning to Fruiting Conditions
2. Preparing the Substrate
The substrate is the food source for your oyster mushrooms, and preparing it correctly is essential for a successful grow. Oyster mushrooms can thrive on a variety of substrates, with straw and hardwood sawdust being two of the most common choices.
- Using Straw as a Substrate:
- Chop and Soak the Straw: Cut the straw into 2-4 inch pieces to create a manageable texture for the mycelium to colonize. Soak the chopped straw in warm water for 12-24 hours. This process helps to hydrate the straw fully, which is necessary for the mycelium to spread.
- Pasteurize the Straw: After soaking, heat the straw in water at 160-180°F (71-82°C) for 1 hour. Pasteurization reduces harmful bacteria and molds without completely sterilizing the substrate. Use a large pot or a dedicated pasteurization container for this step.
- Drain and Cool: Once pasteurized, drain the straw thoroughly and spread it out on a clean surface to cool to room temperature. The straw should feel damp but not dripping wet—excess moisture can lead to contamination.
- Using Sawdust as a Substrate:
- Mixing the Substrate: Use hardwood sawdust, such as oak or beech, mixed with a small amount of supplements like wheat bran (10-20% by weight) to increase the nutrient content. Mix thoroughly to ensure an even distribution of supplements.
- Moisture Content: Aim for around 60% moisture content in the substrate. A simple way to test this is the “squeeze test”—when you squeeze a handful of the mixture, it should hold together without releasing more than a few drops of water.
- Sterilization: Pack the sawdust mix into mushroom grow bags, leaving some space at the top. Sterilize the filled bags in a pressure cooker at 15 PSI for 90-120 minutes. Sterilization ensures that no competing organisms outgrow your mushroom spawn. Allow the bags to cool completely before inoculation to avoid killing the spawn.
Tip: Straw is a great beginner substrate because it doesn’t require full sterilization, making the preparation process faster and simpler than sawdust.
3. Inoculating the Substrate
Inoculation is the process of introducing your oyster mushroom grain spawn into the prepared substrate, allowing the mycelium to colonize and grow throughout the medium.
- Clean Your Workspace: Make sure your working area is clean and sanitized. Wipe down surfaces with alcohol and wash your hands thoroughly. Contaminants at this stage can ruin your grow.
- Mixing the Spawn: Open the cooled grow bag and add 2-3 cups of oyster mushroom grain spawn. Use sanitized hands or utensils to mix the spawn evenly into the substrate, breaking up any clumps to ensure good contact.
- Filling the Bags: Once mixed, pack the substrate into the grow bags, leaving space at the top for air exchange. Fold the top of the bag and seal it with a heat sealer or a zip tie, making sure that the filter patch remains exposed for proper airflow.
Common Mistake: Not mixing the spawn evenly can cause uneven colonization, leading to slower growth or contamination in isolated spots. Take the time to distribute the spawn throughout the substrate.
4. Incubating Oyster Mushrooms
Incubation is the period where the mycelium grows and spreads throughout the substrate, creating a solid mass that will eventually produce mushrooms.
- Store in the Dark: Place the inoculated bags in a warm, dark area with temperatures between 65-75°F (18-24°C). Light is not needed during this stage, as the mycelium will grow well in darkness.
- Monitor for White Growth: Over the next 2-3 weeks, you’ll observe the mycelium spreading through the substrate, turning it a solid white. Check the bags regularly for any signs of mold or discoloration.
- Check for Contaminants: If you notice any green, black, or yellow spots, this indicates contamination. Carefully remove the affected bags to prevent the spread of mold spores to healthy bags.
Fun Fact: The term “mycelium” refers to the vegetative part of the fungus, which looks like a network of white threads spreading through the substrate.
5. How to Tell if Fully Colonized
Knowing when your substrate is fully colonized is crucial before moving on to fruiting conditions.
- Uniform White Coverage: The substrate should be covered in a thick, white layer of mycelium with no visible patches of the original substrate.
- Firm Feel: Gently press the bag—it should feel solid and firm due to the mycelium binding the substrate together.
- No Unusual Odors: A healthy colonized bag should smell earthy. Any sour or off smells indicate contamination, and the bag should be discarded.
Tip: Allowing the mycelium to fully colonize helps ensure that it is strong enough to outcompete any contaminants during the fruiting stage.
6. Transitioning to Fruiting Conditions
Once the substrate is fully colonized, it’s time to introduce conditions that encourage your oyster mushrooms to start forming.
- Set Up a Fruiting Chamber: Use a clear plastic tote with holes drilled into the sides for airflow. Line the bottom with wet perlite or place a damp towel to maintain humidity.
- Cutting Slits in the Bag: Use a clean knife to cut 2-3 slits or “X” shapes in the bag. This allows the mushrooms to grow out of the bag. Position the cuts so they have room to expand outward.
- Place the Bag in the Fruiting Chamber: Position the bag so that the slits are exposed to the humid environment. Keep humidity levels between 85-95% by misting the inside of the chamber daily or using a small humidifier.
- Light and Air Exchange: Oyster mushrooms need indirect light for 12 hours per day during fruiting. A nearby window or simple LED light can suffice. Make sure there is enough air exchange to prevent CO2 buildup, which can cause mushrooms to develop long stems and small caps.
Common Mistake: Inconsistent humidity can cause the mushroom pins to dry out before they fully form. Keep the environment evenly moist but avoid direct water contact with the forming mushrooms.
7. When and How to Harvest
Harvesting oyster mushrooms at the right time ensures the best flavor and texture.
- When to Harvest: Oyster mushrooms are ready when the caps have fully expanded but the edges are still slightly curled under. If the caps start to flatten out or release spores, they are overripe and may become tough.
- How to Harvest: Use a sharp, clean knife to cut the mushrooms at the base, close to the bag. Avoid twisting or pulling, as this can damage the remaining mycelium.
- Prepare for a Second Flush: After the first harvest, let the block rest in the fruiting conditions for a few weeks. Often, a second wave of mushrooms will grow from the remaining mycelium.
Pro Tip: Harvesting just before the caps flatten results in a sweeter, more tender flavor, perfect for culinary use.
Growing Oyster Mushrooms on Logs: A Step-by-Step Guide
Oyster mushrooms (Pleurotus spp.) are among the most adaptable and fast-growing gourmet mushrooms, making them a popular choice for outdoor cultivation. Growing oyster mushrooms on logs is a rewarding long-term project that can provide fresh mushrooms over multiple years. This guide will walk you through each step, from selecting logs to harvesting your first flush, with tips and timelines for successful cultivation.
1. Preparing Supplies and Choosing the Right Logs
Before starting your oyster mushroom log project, it’s essential to gather the right supplies and choose suitable logs. The preparation stage can take a few days to a few weeks, depending on when you can source fresh logs and gather materials.
Oyster Mushroom Log Growing Kit: You can purchase kits that include plug spawn, wax, and tools, making it easier to get started. Check out North Spore’s Oyster Mushroom Log Growing Kits if you choose this option.
- Oyster Mushroom Plug Spawn: Plug spawn consists of small wooden dowels inoculated with oyster mushroom mycelium. These plugs will be inserted into the logs to initiate colonization. Buy from reputable suppliers for the best quality.
- Logs: Freshly cut hardwood logs are ideal for oyster mushrooms. Choose hardwoods like oak, beech, poplar, or maple, which retain moisture well and provide a steady food source for the mushrooms.
- Inoculation Tools:
- Drill with a 5/16-inch Drill Bit: To create holes for inserting the plug spawn.
- Cheese Wax or Tree Wax: To seal the inoculation points, preventing moisture loss and contamination.
- Hammer or Rubber Mallet: For tapping the plug spawn into the holes.
Log Selection Timeline:
- Cutting the Logs: Logs should be cut from live hardwood trees 2-6 weeks before inoculation. This ensures the logs retain moisture but have time to shed any natural antifungal properties.
- Log Size: Ideal logs are 3-4 feet long and 4-8 inches in diameter. This size allows easy handling while providing enough space for the mycelium to colonize.
Tip: The best time to cut logs is in late winter or early spring when the trees have higher moisture content, helping the mycelium spread more effectively.
2. Inoculating the Logs
Inoculation is the process of introducing oyster mushroom mycelium into the logs, giving it a foothold to colonize the wood. This step is crucial for a successful harvest and typically takes 1-2 hours per log, depending on the number of logs you prepare.
- Drilling Holes:
- Use a 5/16-inch drill bit to drill holes along the length of the logs, spaced 4-6 inches apart in a diamond pattern. Each hole should be 1-1.5 inches deep to accommodate the plug spawn.
- A standard 3-foot log will need about 30-40 holes to ensure even colonization by the mycelium.
- Inserting Plug Spawn:
- Place a plug spawn into each drilled hole, ensuring it fits snugly. Use a hammer or rubber mallet to tap the plugs gently until they are flush with the log’s surface.
- Ensure that the plugs are secure to maintain good contact between the spawn and the wood, promoting faster colonization.
- Sealing with Wax:
- Melt cheese wax or tree wax and brush it over each inoculation hole, sealing the plugs inside.
- This step prevents the plugs from drying out and helps protect against contaminants like mold and other fungi.
- Consider applying wax to the cut ends of the logs as well to retain moisture during the colonization period. (Yes this does make a difference)
Common Mistake: Forgetting to seal inoculation points can cause the plugs to dry out, significantly delaying colonization. Always ensure the holes are properly sealed with wax.
3. Placing the Inoculated Logs for Incubation
After inoculating the logs, the next step is to place them in a suitable environment for the mycelium to spread throughout the wood. Incubation can take between 6 to 12 months, depending on the type of wood, local climate, and the size of the logs.
- Location Selection:
- Choose a shady, humid area outdoors, such as under a tree canopy, next to a building, or in a shaded garden area. Consistent shade helps prevent the logs from drying out.
- Elevate the logs off the ground using bricks, pallets, or other logs to prevent contamination from soil and to maintain good airflow around the logs.
- Stacking Methods:
- Lean-To Stack: Propping the logs against each other allows air circulation while keeping them stable.
- Log Cabin Stack: Crisscrossing logs in a log cabin style is another effective way to stack them, maintaining stability and ventilation.
- Moisture Maintenance:
- Keep the logs moist during dry spells by using a garden hose to spray them down or soaking them in water for a few hours if conditions become very dry.
- Proper moisture levels are essential for mycelium growth. Logs should feel damp but not waterlogged.
Tip: During hot or dry weather, mist the logs regularly to maintain moisture and help speed up the colonization process.
Common Mistake: Neglecting the logs during the incubation period can cause them to dry out, slowing mycelium growth. Regularly check the moisture level, especially during summer months.
4. Incubating the Logs
Incubation is the phase where the mycelium spreads throughout the log, breaking down the wood and creating a nutrient-rich environment for the mushrooms. This stage requires patience and careful monitoring.
- Timeline: Full colonization can take 6-12 months, depending on the type of wood, local climate, and the initial moisture content of the logs.
- Signs of Mycelium Growth:
- Look for white, thread-like mycelium forming around the inoculation points and under the bark. This indicates that the mycelium is spreading through the log.
- Do not be alarmed if growth seems slow at first—much of the activity is happening inside the log, where the mycelium is breaking down wood fibers.
- Moisture Check: Check the logs periodically to ensure they remain moist. A lack of moisture can stall mycelium growth or cause it to die back.
Fun Fact: During this phase, mycelium acts like a natural recycler, breaking down the lignin and cellulose in the wood and converting it into a food source that will eventually produce oyster mushrooms.
5. How to Tell if Logs Are Fully Colonized
It’s important to recognize when your logs are fully colonized before moving on to fruiting. Properly colonized logs will be ready to produce mushrooms when environmental conditions trigger fruiting.
- Signs of Full Colonization:
- White Mycelium Spread: Peel back a small section of bark to check for a thick layer of white, fuzzy mycelium underneath.
- Firm Logs: Tap the logs with a hammer. Fully colonized logs will sound solid, indicating that the wood has been well colonized.
- Earthy Smell: A healthy, colonized log should smell like fresh earth. A sour or musty smell can indicate contamination.
Tip: Logs inoculated in spring may begin to fruit by the following fall or the next spring, depending on climate conditions and wood type.
6. Encouraging Fruiting and Harvesting Oyster Mushrooms
Once your logs are fully colonized, it’s time to encourage fruiting. Oyster mushrooms typically fruit when temperatures and humidity levels are suitable, usually in the cooler months of spring and fall.
- Soaking the Logs:
- To initiate fruiting, soak the logs in water for 12-24 hours. Submerge them in a large tub or pond to fully rehydrate the wood and simulate a natural rain event.
- This soaking “wakes up” the mycelium and signals that it’s time to produce mushrooms.
- Placing in Fruiting Conditions:
- After soaking, place the logs in a shady, humid area where they will be exposed to natural airflow and indirect sunlight.
- Maintain 85-95% humidity around the logs by misting them regularly or using a garden sprinkler.
- Mushroom Growth Timeline:
- Pins (tiny mushroom clusters) may appear within 1-2 weeks of soaking. These will develop into mature oyster mushrooms within 5-10 days, depending on temperature and humidity.
- Harvest the mushrooms when the caps are fully formed but the edges are still slightly curled inward.
How to Harvest:
- Timing: Harvest oyster mushrooms when the caps are well-developed but before they begin to flatten out and release spores.
- Technique: Use a clean knife to cut the mushroom clusters at the base, close to the log. Avoid twisting or pulling, as this can damage the mycelium and reduce future yields.
Pro Tip: Well-maintained logs can produce mushrooms for 2-4 years, with multiple fruiting cycles each year. After each harvest, keep the logs in a humid environment to encourage further growth.
7. Common Issues and Solutions
Growing oyster mushrooms on logs can present a few challenges. Here’s how to tackle common issues:
- Competing Fungi: If other fungi begin to grow on your logs, increase airflow and make sure the logs are elevated off the ground.
- Slow Growth: If colonization is slow, try soaking the logs again to boost moisture levels, or move them to a warmer, more humid area.
- Mushrooms Drying Out: If mushrooms dry out before fully maturing, mist the logs more frequently to maintain high humidity.
Final Thoughts
Growing oyster mushrooms on logs is a time-honored method that provides a long-term yield of fresh, delicious mushrooms. With patience and attention to detail, you’ll be rewarded with multiple harvests over several years, making this project a valuable addition to any home garden. Enjoy your journey into outdoor mushroom cultivation!
How to Store Oyster Mushrooms
Proper storage is key to maintaining the freshness and quality of your oyster mushrooms. Follow these methods to extend the shelf life of your harvest and enjoy them at their best.
- Refrigeration: Store fresh oyster mushrooms in a paper bag in the refrigerator. The paper bag helps absorb excess moisture, keeping the mushrooms from becoming soggy. When stored this way, oyster mushrooms can stay fresh for up to 7-10 days.
- Freezing: For longer storage, sauté your oyster mushrooms lightly before freezing to preserve their flavor and texture. Once cooled, place them in airtight containers or freezer bags. This method helps maintain their quality for up to 3 months.
- Dehydration: Dehydrating oyster mushrooms is a great option if you want to store them for even longer. Use a food dehydrator or set your oven to a low temperature to dry them. Once fully dried, store the mushrooms in an airtight container in a cool, dark place, and they can last for up to a year.
Fresh vs. Dried Oyster Mushrooms
When deciding how to use or store your oyster mushrooms, it’s important to understand the differences between fresh and dried mushrooms:
- Fresh Oyster Mushrooms: Fresh oyster mushrooms have a tender texture and mild, earthy flavor. They are perfect for sautéing, adding to pasta dishes, or incorporating into stir-fries. Fresh mushrooms also work well in soups and as a topping for pizzas or salads.
- Dried Oyster Mushrooms: Dried mushrooms have a more intense, concentrated flavor. Rehydrated oyster mushrooms are excellent in broths, stews, and risottos, where they can absorb the surrounding flavors. Dried mushrooms can also be ground into a powder and used as a seasoning in various dishes.
Pro Tip: Rehydrating dried oyster mushrooms is easy—just soak them in warm water for about 20-30 minutes until they become tender again.
Dive Deeper into Mushroom Cultivation
Growing oyster mushrooms on logs or using the bag method is a rewarding way to cultivate fresh, delicious mushrooms at home. With patience and the right techniques, you can enjoy a consistent harvest that brings both flavor and nutrition to your kitchen. Once you’ve mastered the basics of growing oyster mushrooms, you might want to explore other exciting projects in mushroom cultivation:
- Oyster Mushroom Recipes: Learn how to make mouth-watering dishes like oyster mushroom stir-fry, creamy pasta with sautéed oyster mushrooms, and more.
- How to Make a Mushroom Powder: Discover the simple process of making your own mushroom powder from dried oyster mushrooms, perfect for adding a nutritional boost to soups, sauces, and smoothies.
- More How-to-Grow Guides: Check out our in-depth guides on cultivating other mushroom varieties, including Shiitake, Reishi, and Lion’s Mane, to expand your home mushroom farm.
- Free Downloadable Mushroom Growing Book: Get access to our free, downloadable book that covers everything from beginner tips to advanced techniques in mushroom cultivation.
These resources will help you make the most of your oyster mushroom harvest and continue exploring the fascinating world of fungi. Happy growing, and enjoy your harvest!